
Admittedly, calling this a recipe is bit of a misnomer. Rather than set-in-stone rules, this is more like a loose set of guidelines, which generally describes my cooking philosophy too. But with cooler weather coming, I figured it's good time to share this "recipe" for miso-pesto vegetable soup. It's hearty, healthy and can be made in a hurry—from fridge & pantry to the table in under 15 minutes.
Even better yet, it utilizes ingredients that I pretty much have on standby all the time: vegetables, miso paste, pesto sauce and some seasonings. And in the latest rendition of this soup, I found it works wonderfully with a bag of frozen vegetables too (yes, that middle American mix of peas, corns, carrots, lima and green beans,) since it still gets a flavor boost from the deeply savory miso and vibrant pesto.
While this vegan soup satisfying enough as is, if I'm feeling extra indulgent I'd throw in a splash of cream and top it with some cheese too.
Miso-Pesto Vegetable Soup
Serves 1 as entree, or 2 as starter
Ingredients:
- 2 cups of frozen mixed vegetables (carrots, pea, corn, bean), with enough water to cover them
- 2 garlic cloves, peeled
- 3 scallions, white & light green parts only, chopped
- 2 teaspoons pesto sauce
- 2 teaspoons miso paste
- 1 tablespoon heavy cream (optional)
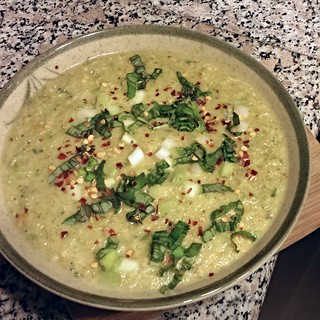
- your garnish of choice (e.g. chili flakes, chopped basil & scallions, grated cheese)
1. In a saucepan, combine vegetables with water, garlic cloves, scallions and miso paste and bring to a gentle boil over medium heat.
2. Once boiling, turn the heat to low and add pesto sauce (and cream, if using), stir & let it simmer for another minute.
3. Turn off stove and pour the saucepan's contents into a blender, blitz it for about 30 seconds - or until "smoothish" but with some lumps and bits. Note: keep the center hole open (and loosely covered with a cloth or paper towel) so the resulting steam doesn't blast the whole lid off.
4. Pour into bowl(s), garnish as desired and serve.
No comments:
Post a Comment