I don't fancy myself as much of a confectioner, considering how anxious I get over exact measurements and a big role of candymaking is boiling the syrup the right temperature.
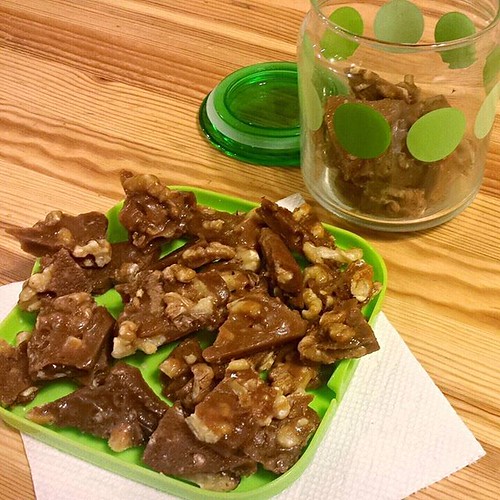
So I was rather surprised at how this easy and delicious maple nut toffee turned out, since the recipe is fairly forgiving. Instead of a thermometer (which I don't have), I used the cold water candy test. And it's a lot less stressful than one (including myself) imagine. Just plunge a small spoon's worth of syrup into cold water and use your hand to see what stage the resulting candy is.
Maple Nut Toffee / Brittle
(adapted from California Walnuts' website)
about 50-60 bite-sized pieces
Ingredients:
2 cups of raw, unsalted nuts, roughly chopped (I prefer walnuts, pecans or cashews since their softer crunch is a nice contrast against the snap of the toffee)
1/2 cup granulated white sugar
1/2 cup light brown sugar
1/4 cup grade B maple syrup*
1 cup (2 sticks) of unsalted butter, cut into smallish pieces (for faster melting)
2 teaspoons vanilla extract
1/4 cup water
extra cold water for candy testing
*the grades of maple syrup is not about quality, but whether its color (& by association, "mapliness") — for cooking I prefer Grade B since it allows that distinctive busky, woodsy flavor to shine through.
Directions:
1. In a non-stick pan over medium-high heat, heat the chopped nuts, stirring/tossing regularly. Once it starts getting toasty (you'll start smelling the nutty aromas, and the nuts will start to char around the edges), turn off heat and set aside.
2. In a stainless steel pan, combine all the other ingredients and bring to low, gentle boil over medium-high heat, stirring as needed to melt the butter and mix everything together into a syrup.
3. Once the mixture starts to boil, lower heat as needed to bring it to a simmer and allow it to heat for another 15-20 minutes. Do not stir during this time.
4. When the candy color is a medium brown, do a cold water candy test. When it hits the hard crack stage (or when it hits 300 degrees Fahrenheit — if you have a cooking thermometer), turn the heat off and remove the pan from the burner. (Per the linked page, be careful when working with the hot candy syrup)
5. Add the toasted nuts into the syrup and stir to evenly incorporate the two.
6. Pour the mixture into a baking pan (I used a 8"x12") and spread evenly to cover all edges & corners. You can use a larger pan for a thinner layer candy, making it more of a brittle than a toffee.
7. Set and allow to cool for a few hours (or overnight) at room temperature.
8. Break the sheet of toffee into bite-sized pieces to store and enjoy!
Showing posts with label vegetarian. Show all posts
Monday, August 31, 2015
Friday, February 21, 2014
Recipe: Grilled Halloumi w Pickled Onion
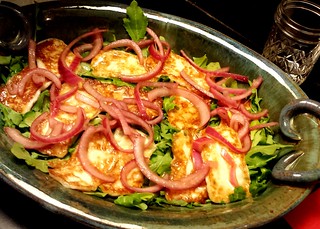
This is one of my standby appetizers when I'm going to a potluck or hosting a party. It's vibrantly colorful with translucent, jewel-like red onions set against bronzed slabs of halloumi and a bed of fresh greens and more importantly for gatherings—this crowd pleaser is a cinch to make, so you can actually enjoy the party too rather than slave away in the kitchen.
Simply give the onions a quick chop & pickling an hour prior, then pan fry some halloumi on a pan just prior to serving. Then voila, a plate of oozy, salty cheese (which is what I love about halloumi, its high melting point means you can get a crispy char on the outside while it retains a softened, almost but not quite melted texture within) whose richness is cut with acidic onions and peppery arugula.
In hindsight, I kinda feel guilty even calling this a "recipe", but the results are definitely splendid.
Grilled Halloumi with Pickled Onion
Ingredients (serves approx. 8)
14 oz. Halloumi cheese, sliced into quarter-inch slabs
1 small red onion, cut in half vertically, then thinly sliced so you get semi-circles out of the rings
4 oz. red wine vinegar
1 oz. water
1 teaspoon sugar
2 cups arugula, washed & dried (or your leafy greens of choice)
vegetable oil
Directions:
1. About an hour before serving, put the sliced onions in a bowl or a jar and add vinegar, water and sugar. Swish or shake occasionally, making sure all the slices have some time to immerse in the vinegar mixture.
2. 10 minutes before serving, heat up a skillet on medium-high heat for 30 seconds. While skillet is heating, put the arugula in a platter.
3. Add enough vegetable oil to coat the surface of the skillet, then put the cut slabs of halloumi cheese in.
4. In about a minute or two (when you see the edges of the cheese getting golden brown & bubbly), flip the halloumi and allow it to pan fry for another minute.
5. Put the halloumi on top of the arugula, then the pickled onion slices.
6. Pour half the pickling brine onto the skillet to deglaze, then drizzle over platter and serve.
Wednesday, October 16, 2013
Recipe: Miso-Pesto Vegetable Soup
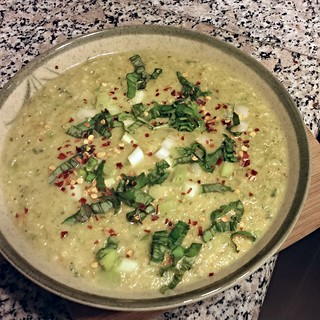
Admittedly, calling this a recipe is bit of a misnomer. Rather than set-in-stone rules, this is more like a loose set of guidelines, which generally describes my cooking philosophy too. But with cooler weather coming, I figured it's good time to share this "recipe" for miso-pesto vegetable soup. It's hearty, healthy and can be made in a hurry—from fridge & pantry to the table in under 15 minutes.
I also love that this feels more substantial than the typical pureed vegetable soups; even after a blitz in the blender, it still has rough, nubbly bits to give it some texture, so I don't feel like I'm on a liquid diet.
Even better yet, it utilizes ingredients that I pretty much have on standby all the time: vegetables, miso paste, pesto sauce and some seasonings. And in the latest rendition of this soup, I found it works wonderfully with a bag of frozen vegetables too (yes, that middle American mix of peas, corns, carrots, lima and green beans,) since it still gets a flavor boost from the deeply savory miso and vibrant pesto.
While this vegan soup satisfying enough as is, if I'm feeling extra indulgent I'd throw in a splash of cream and top it with some cheese too.
Friday, August 30, 2013
Recipe: Stir-Fried Pepper Corn
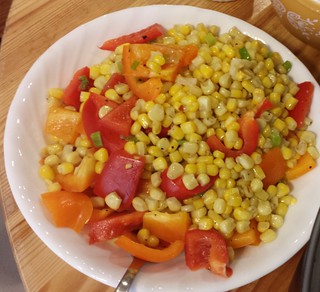
I know nothing beats shucking kernels off a freshly steamed/boiled/grilled cob, but this stir-fried pepper corn is excellent too, especially when fresh corn is out of season (you can swap in frozen corn!) And no matter what time of year, its sunny hues, sweet crunch & fiery heat (from a chili-infused oil) make for an instant, delicious throwback to warmer, brighter summer days.
This recipe is adapted from Grace Young's Stir-Frying to the Sky's Edge, my go-to reference for all things wok-related. On top of easy-to-follow recipes and useful ingredient & preparation tips, the book also includes numerous tales of how this simple cooking technique & instrument followed the Chinese population where-ever they traveled, sometimes merging with other cultures and cuisines to create dishes like Chinese-Jamaican Jerk Chicken Fried Rice and Stir-Fried Bagels (which I've tried and actually enjoyed), other times being the only means to get a taste of home no matter where they go.
Of course, there's a plethora of familiar & authentic recipes too, such as yang chow fried rice, kung pao chicken and stir-fried ginger beef (last of which she gave a video demo on.) But her summer pepper corn is one of my reliables for a party, it's a cinch to make and is a great vegetable side that easily complements many main dishes.
Subscribe to:
Posts (Atom)